- CALL : (+1) 407-273-1001
- Main Office : (+1) 407-273-1001
- NetSuite NetSuite Customization
- Jan 09
- 3 mins read
NetSuite Customization – Creating a CSV Text file from the data in a Saved Search (Part 1-2)

Prerequisites:
A NetSuite account, Knowledge of JavaScript.
As a developer, I love how easy it is to build powerful applications on the NetSuite platform. NetSuite allows developers to write applications using SuiteScript, which is really just JavaScript with a touch of clever Marketing/Branding.
No business lives in isolation so it’s quite common for businesses to send data to their trading partners.
One format for sending this data is CSV, Comma Separated Values. As its name implies, a CSV is a simple text file with a comma separating each field in a row. CSV’s have been around from since the beginning of time (so it seems), but they are still a very reliable way of packaging data. As long as the trading partner knows which column contains which value, communication can take place.
Together, we will build a real world application where our fictional company, Sporting Goods, Inc, will send the data of customers that opted in, to our fictional trading partner Mega Publishing, who will in turn, use our customer’s information to try to sell them magazines.
Configure NetSuite
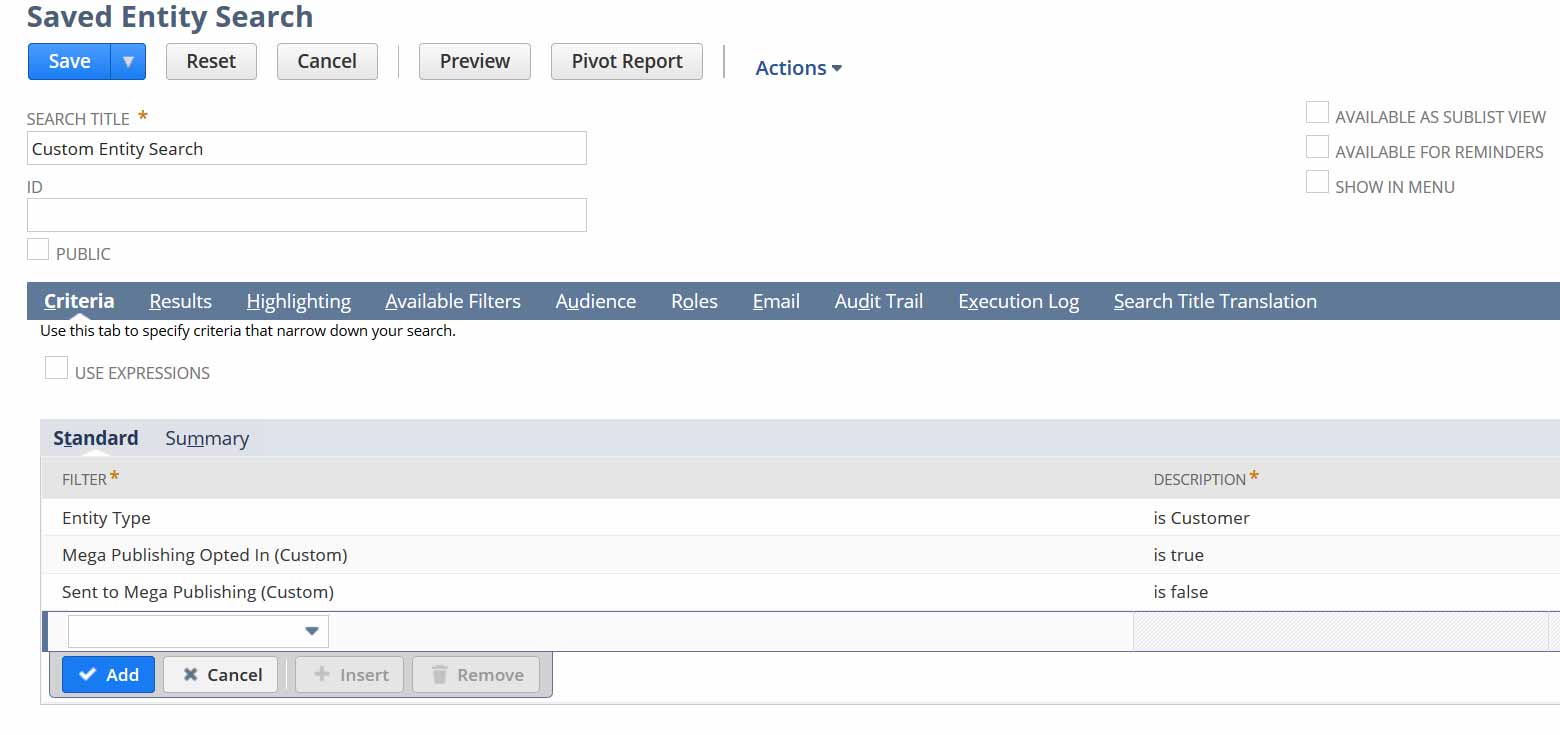
Our first task is to configure NetSuite by creating custom fields to define the data and a saved search to return customers.
Custom Fields
A custom field in NetSuite allows users a way of adding data fields to a record. For this application, we will need two custom fields to be added to the Customer record.
1. Mega Publishing Opted-In. A check box that indicates if a customer has opted in to receive marketing information from Mega Publishing
2. Sent to Mega Publishing. A second checkbox that indicates if the script has already included this customer in the CSV field to be sent to Mega Publishing.
Here is an example of creating the Mega Publishing Opted-In field. The Sent to Mega Publishing field will need to be created a similar way. You can also use this field creation form to give only certain users access to this field as well as control the placement of the field on the form.


The results show the customers we expect:

This series was broken up into two parts. To continue on to part 2 please click HERE!
Jeremy McCourt is an content producer in the enterprise software industry that focuses on NetSuite and related cloud-based software solutions.
Related Posts

NetSuite Training 101 (The 2023 Complete Guide)
NetSuite training is an underrated and often overlooked part of the NetSuite ecosystem. In this article, we do what we can to break down why NetSuite training is a critical part of NetSuite users finding…
- Aug 21
- 6 mins read

What is NetSuite Customization? The 2023 Complete Guide
NetSuite, as a leading cloud-based ERP system, has gained immense popularity among businesses worldwide. However, to truly harness its potential, customization is often necessary. In this comprehensive guide, we delve into the world of NetSuite…
- Aug 16
- 6 mins read


Comments (2)
The Jewelry Store
Apr 13, 2015Nice article, It was practical.
martin
Aug 01, 2015Really nice post!! You described it really very well how to customized custom fields and used in generating reports.